Getting Started
This is a tutorial that aims to help you to understand how to write a backend using Gazel. Before you begin, you need to create an empty solution.
You may download an empty solution to start right away. Once you open this solution, directory structure should look like this:
Inventiv.Sample
├── src
│   ├── Inventiv.Sample.App.Rest
│   ├── Inventiv.Sample.App.Service
│   └── Inventiv.Sample.Module.Todo
└── test
    └── Inventiv.Sample.Test.Todo
If you want to create an empty solution on your own, have a look at below pages;
Basically, you will need to create a new solution named Inventiv.Sample and
add a new business module named Inventiv.Sample.Module.Todo.
Now that you have done this, you are ready to get started 🚀
Hello World
In this tutorial, you will create a hello world service to have a quick feeling on how Gazel works.
Create a Hello World Service
To create a new business service, create a class named TodoManager in
Inventiv.Sample.Module.Todo project.
Inventiv.Sample
├── src
│   ├── Inventiv.Sample.App.Rest
│   ├── Inventiv.Sample.App.Service
│   └── Inventiv.Sample.Module.Todo
│       └── TodoManager.cs
└── test
    └── Inventiv.Sample.Test.Todo
Now add a new method called SayHello to TodoManager class as shown below.
namespace Inventiv.Sample.Module.Todo;public class TodoManager{ public string SayHello() { return "Hello World"; }}public instance methods of classes within module projects are directly
exposed as business services.
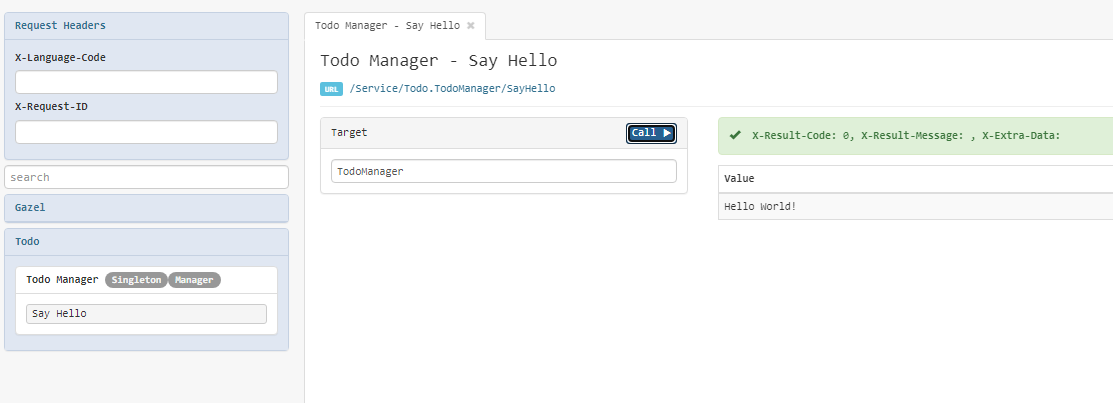
Now run Inventiv.Sample.App.Service project, and you will see a test page to
be able to test your services.
On the left you will see that Gazel has rendered your Todo module and
listed TodoManager class as a service package, and under Todo Manager it
lists your SayHello method as a business service. Click Say Hello and
press Call button to make a test service request. When you do, you will see a
response saying Hello World.
Writing a Unit Test
Now that you have implemented the most basic business service, it is time to test it.
Create a class named TodoTest in Inventiv.Sample.Test.Todo project.
Inventiv.Sample
├── src
│   ├── Inventiv.Sample.App.Rest
│   ├── Inventiv.Sample.App.Service
│   └── Inventiv.Sample.Module.Todo
│       └── TodoManager.cs
└── test
    └── Inventiv.Sample.Test.Todo
        └── TodoTest.cs
Write below code within this class;
using Gazel;using Gazel.UnitTesting;using Inventiv.Sample.Module.Todo;namespace Inventiv.Sample.Test.Todo;[TestFixture]public class TodoTest : TestBase{ static TodoTest() { Config.RootNamespace = "Inventiv"; } [Test] public void SayHello__says_hello() { var todoManager = Context.Get<TodoManager>(); Assert.That(todoManager.SayHello(), Is.EqualTo("Hello World!")); }}Context property comes from TestBase which allows you to access IoC
container. Manager classes are singleton by convention, so you can access to
TodoManager instance by Context.Get<TodoManager>().
That's it. Now you can run this test to see if it succeeds.
Gazel uses NUnit for unit testing. For more information about NUnit see: NUnit Documentation
Summary
As you can see no configuration is needed to create a new service. Once you've created your solution and projects, every public class in module projects becomes a service package and every public method becomes a service by convention.
Now try to add new methods or add parameters, re-run and see the results.
Once you are ready, you can proceed to create your first database operation using Gazel.
Here you can download source code for this tutorial .
Persistent Classes
In this tutorial, you will create a persistent class and make your first database operation using Gazel.
Create A Persistent Class
Database operations are done using Persistent objects.
An object is Persistent if its class injects its own repository. For more
information see: Data Persistence
Create a new class named TaskCard under Todo module.
Inventiv.Sample
├── src
│   ├── Inventiv.Sample.App.Rest
│   ├── Inventiv.Sample.App.Service
│   └── Inventiv.Sample.Module.Todo
│       ├── TodoManager.cs
│       └── TaskCard.cs
└── test
    └── Inventiv.Sample.Test.Todo
        └── TodoTest.cs
Add following code to your TaskCard source file.
using Gazel;using Gazel.DataAccess;namespace Inventiv.Sample.Module.Todo;public class TaskCard{ private readonly IRepository<TaskCard> _repository = default!; protected TaskCard() { } public TaskCard(IRepository<TaskCard> repository) { _repository = repository; }}public class TaskCards : Query<TaskCard>{ public TaskCards(IModuleContext context) : base(context) { }}Each TaskCard object will represent one row in TaskCard table.
TaskCards class is registered to IoC as a singleton by convention and it
will consist of queries to that table. In this tutorial you will not write
any queries. Leave this class empty for now.
TaskCard class, by injecting its own repository, indicates that its a
persistent class.
Notice that both classes are subject to dependency injection.
protected TaskCard() { } constructor is there for NHibernate to create
proxies for lazy loading.
Now you can add properties to your TaskCard class as shown below;
...public class TaskCard{ ... public virtual int Id { get; protected set; } public virtual string? Name { get; protected set; } public virtual bool Completed { get; protected set; } ...}...First property is mandatory for all persistent classes. Gazel requires an integer Id column for every table.
The reason for protected setters is to implement domain logic inside
persistent classes.
virtual keywords are there for NHibernate to create proxies for lazy
loading.
These properties are automatically mapped to columns of TaskCard table in
gazel.tutorial.db database.
Note that you don't have to create tables and columns in your SQLite database. When in local development mode, Gazel configures NHibernate's SQLite connection to automatically create database schema.
Now add following method to TaskCard class.
...public class TaskCard{ ... protected internal virtual TaskCard With(string? name) { Name = name; Completed = false; _repository.Insert(this); return this; } ...}...For persistent classes construction is in two steps. First step is the actual
constructor, and second step is With methods which takes instance arguments
and inserts a row to database via _repository.
Go to TodoManager class in Todo module and modify its content with the
following code;
using Gazel;namespace Inventiv.Sample.Module.Todo;public class TodoManager{ private readonly IModuleContext _context; public TodoManager(IModuleContext context) { _context = context; } public TaskCard CreateTaskCard(string? name) { return _context.New<TaskCard>().With(name); }}You've created a business service named CreateTaskCard that inserts a new
task card record with the given name. As mentioned above, construction is done
in two steps;
- The first one is
_context.New<TaskCard>()which initiates a newTaskCardobject using IoC container, - And the second one is
.With(name)which inserts a new record using its own_repository.
So together you read this as "new task card with name".
Now run App.Service project to see your new service Create Task Card and
create task cards using it.
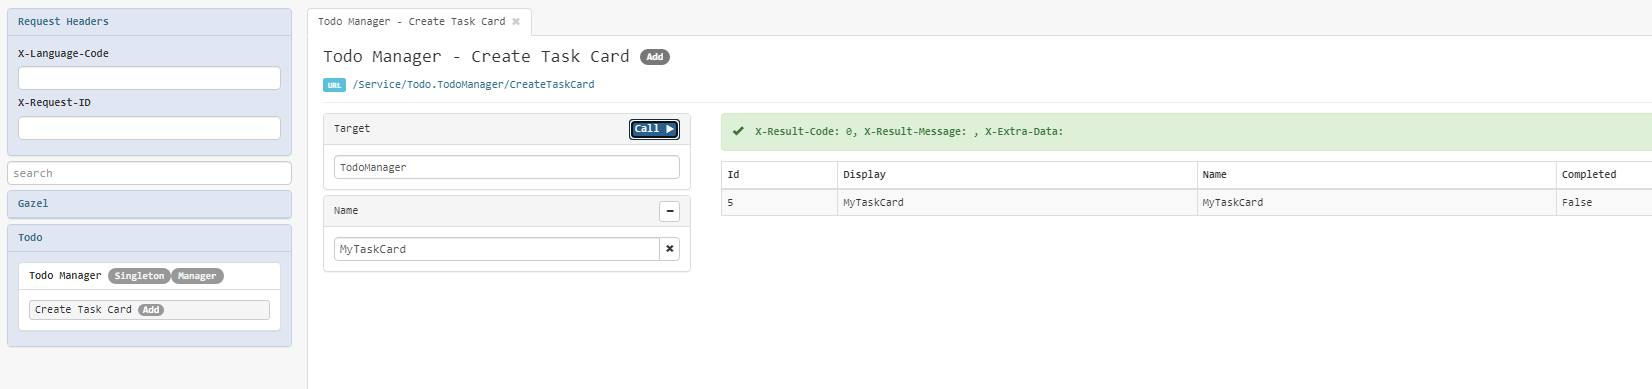
Note that Id's are assigned from database. This is the default mapping configuration Gazel applies to NHibernate.
Testing Persistent Objects
Go to TodoTest class in Test.Todo add following test case;
...[TestFixture]public class TodoTest : TestBase{ ... [Test] public void CreateTaskCard__creates_a_task_card_using_given_name() { var todoManager = Context.Get<TodoManager>(); BeginTest(); var actual = todoManager.CreateTaskCard("Write Tests"); Verify.ObjectIsPersisted(actual); Assert.That(actual.Name, Is.EqualTo("Write Tests")); } ...}...You may remove SayHello__says_hello test case from previous tutorial.
Here is what this test does in terms of AAA pattern;
- Arrange: Gets
TodoManagerinstance from context - Act: Creates a task card named "Write Tests"
- Assert: Verifies that the
TaskCardobject is persisted and its name is "Write Tests"
BeginTest() call prepares underlying mechanism for the execution of service
under test.
Verify property comes from TestBase class. It basically helps you to check
if object is persisted or deleted.
When testing, Gazel configures a fake service application in which there is a database connection to an in-memory SQLite database. For every test case, it begins a transaction and rollbacks after execution.
Summary
Like manager classes, persistent classes also follow conventions. In this tutorial you've created a table and a create service using no configuration.
Now try to add new properties to TaskCard class or add new persistent
classes, re-run and see the results.
Once you are ready, you can proceed to learn how to update a record in database.
Here you can download source code for this tutorial .
Database Transactions
In this tutorial, you will create an update service and learn about how Gazel manages database transactions.
Business Service on Persistent Objects
Now that you've created task cards, it's time to complete them. To do this add
following method to your TaskCard class.
...public class TaskCard{ ... public virtual void Complete() { Completed = true; } ...}...And that's it. You've created a Complete service.
There is no need to create a database transaction, before every service call Gazel automatically opens a database connection and begins a transaction.
Notice that you don't have to call an update method in repository. Gazel configures NHibernate in auto update mode. This means it makes a dirty check upon commit and update rows when there is a change.
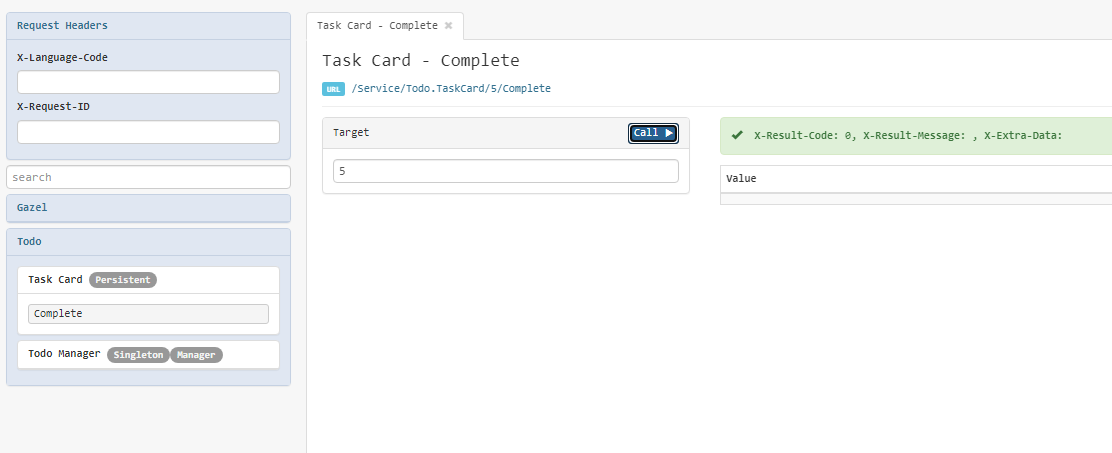
Build and run App.Service again. Now you will see a TaskCard service
package and under this package there is Complete service. Since this service
requires a row in database, Id parameter is added automatically.
Go and create a task card using Task Manager / Create Task Card and use that
object's Id in Target/Id field of Complete service.
When you press call button you will see following screen;
Important note on protected setters
You may remember that we used protected access modifier on property setters
as shown below;
...public class TaskCard{ ... public virtual int Id { get; protected set; } public virtual string? Name { get; protected set; } public virtual bool Completed { get; protected set; } ... } ...As mentioned before protected setters ensure that data of a persistent object
can only be updated within its own class. Gazel is designed to welcome business
services on persistent classes.
If you allow public setters, that is fine too. But this would make it
possible to update a property value from outside. This is because we use auto
update feature of NHibernate.
Always remember that persistent objects in Gazel are not simle DTOs. They are context aware domain objects that manages a row in a database.
Testing an Update Service
Let's move on to testing. Now add following test to your TodoTest test class;
...[TestFixture]public class TodoTest : TestBase{ ... [Test] public void Complete__marks_task_card_as_completed() { var todoManager = Context.Get<TodoManager>(); var taskCard = todoManager.CreateTaskCard("Write Tests"); BeginTest(); taskCard.Complete(); Assert.That(taskCard.Completed, Is.True); }}...Here's what you've done;
- Arrange: Get
TodoManagerobject and create a task card named "Write Tests" - Act: Complete the new
TaskCardobject - Assert: Assert that task card is completed
Note that this time CreateTaskCard is moved before BeginTest(). This is
because for this test case creating a task card is a part of the arrange
step.
Summary
In this tutorial you've learned how to write a simple update service to a method. Now try to add new properties and methods to your persistent classes, re-run and see the results.
Once you are ready, you can proceed to learn how to write query services.
Here you can download source code for this tutorial .
Query Classes
In this tutorial, you will create a query service and learn about query service conventions.
Create a Query Service
Now you will create a query service to see all completed task cards. Add below
code to TaskCards class in TaskCard.cs.
...public class TaskCards : Query<TaskCard>{ ... public List<TaskCard> ByCompleted(bool completed) { return By(t => t.Completed == completed); } ...}...By method is inherited from Query<T> base class, and it simply accepts a
lambda expression with one parameter of type T which is TaskCard in this
example.
Like every public method, this query method is also exposed as a business
service. Build and run App.Service to see your completed task cards.
Query naming conventions;
- When a query method returns a list of objects, the convention is to name it
as
By. - When a query method takes only one parameter, method name contains parameter name as a suffix.
So by these conventions we named this query as ByCompleted. For more
information see: Queries
Testing Queries
Now add following test case to your TodoTest class;
...[TestFixture]public class TodoTest : TestBase{ ... [Test] public void TaskCards_ByCompleted__filters_task_cards_by_completed_column() { var todoManager = Context.Get<TodoManager>(); todoManager.CreateTaskCard("incomplete"); todoManager.CreateTaskCard("completed 1").Complete(); todoManager.CreateTaskCard("completed 2").Complete(); BeginTest(); var actual = Context.Query<TaskCards>().ByCompleted(true); Assert.That(actual.Count, Is.EqualTo(2)); Assert.That(actual[0].Name, Is.EqualTo("completed 1")); Assert.That(actual[1].Name, Is.EqualTo("completed 2")); } ...}...Note that there is a Context.Query<T>() shortcut to access query classes.
Unlike Context.Get<T>() this shortcut is available in module projects as
well, so that you don't have to inject query classes.
Summary
Query classes help you to organize your query methods for the same persistent class into one place, so that you can create reusable query methods.
Now try to create other query methods that accepts more than one parameter, re-run and see the results.
Once you are ready, you can proceed to learn how to create service packages and expose your business services publicly.
Here you can download source code for this tutorial .
Rest API
In this tutorial, you will create a Rest API and learn about configuration and api packaging.
Define a Service Interface
Until now you've created business services for internal use. By internal we mean that they are supposed to be consumed by your applications only. You can always publish your business services directly to outside but this would be hard for you to maintain and refactor your business code. For this reason, you will create an api package out of your business services.
First we will define which services to expose. To do this, create a folder
named Service in Todo module and under this folder create an interface
named ITaskCardService as shown below;
Inventiv.Sample
├── src
│   ├── Inventiv.Sample.App.Rest
│   ├── Inventiv.Sample.App.Service
│   └── Inventiv.Sample.Module.Todo
│       ├── Service
│       │   └── ITaskCardService.cs
│       ├── TodoManager.cs
│       └── TaskCard.cs
└── test
    └── Inventiv.Sample.Test.Todo
This interface is a service interface and it will contain the methods of
TaskCard class that you want to share with the outside world.
Now modify ITaskCardService service interface to include following method;
namespace Inventiv.Sample.Module.Todo.Service;public interface ITaskCardService{ void Complete();}Now go to TaskCard.cs file and make your TaskCard class implement
ITaskCardService interface as shown below;
public class TaskCard : ITaskCardService{ ...}...Notice that you don't have to implement Complete method, since it is
already implemented within TaskCard class.
Create an API Package
To create an api package go to App.Service project and add a class named
TaskCardApi as shown below;
Inventiv.Sample
├── src
│   ├── Inventiv.Sample.App.Rest
│   ├── Inventiv.Sample.App.Service
│   │   └── TaskCardApi.cs
│   └── Inventiv.Sample.Module.Todo
│       ├── Service
│       │   └── ITaskCardService.cs
│       ├── TodoManager.cs
│       └── TaskCard.cs
└── test
    └── Inventiv.Sample.Test.Todo
And add below code to TaskCardApi class;
using Castle.MicroKernel;using Gazel.Configuration;using Inventiv.Sample.Module.Todo;using Inventiv.Sample.Module.Todo.Service;using Routine;using Routine.Engine.Configuration.ConventionBased;namespace Inventiv.Sample.App.Service;public class TaskCardApi : ICodingStyleConfiguration{ public void Configure(ConventionBasedCodingStyle codingStyle, IKernel kernel) { codingStyle.AddTypes(v => v.ApiPackage("TaskCard", t => t .Methods.Add(c => c.Proxy<ITaskCardService>().TargetByParameter<TaskCard>()) )); }}With this configuration, you've created a virtual class -which we call api
package- and added all methods in ITaskCardService class to this virtual
class.
Now build and run App.Service project.
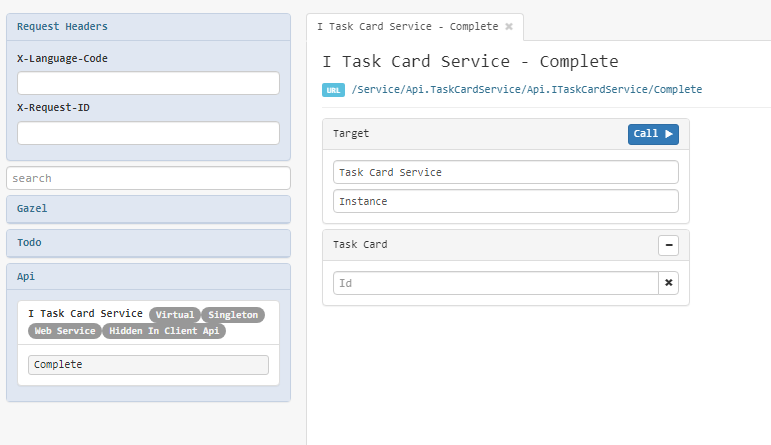
As you can see, there is a new group called Api. Under this group you will
see a new api package named ITaskCardService. You can see that this service
package is marked as Virtual and Web Service. Under this package there is
'Complete' service.
Test your first endpoint
Now build and run both App.Service and App.Rest projects.
App.Rest is an application that acts as a gateway to your internal business
services. It only allows access to the services under Api group.
You will see your first endpoint in Swagger UI;
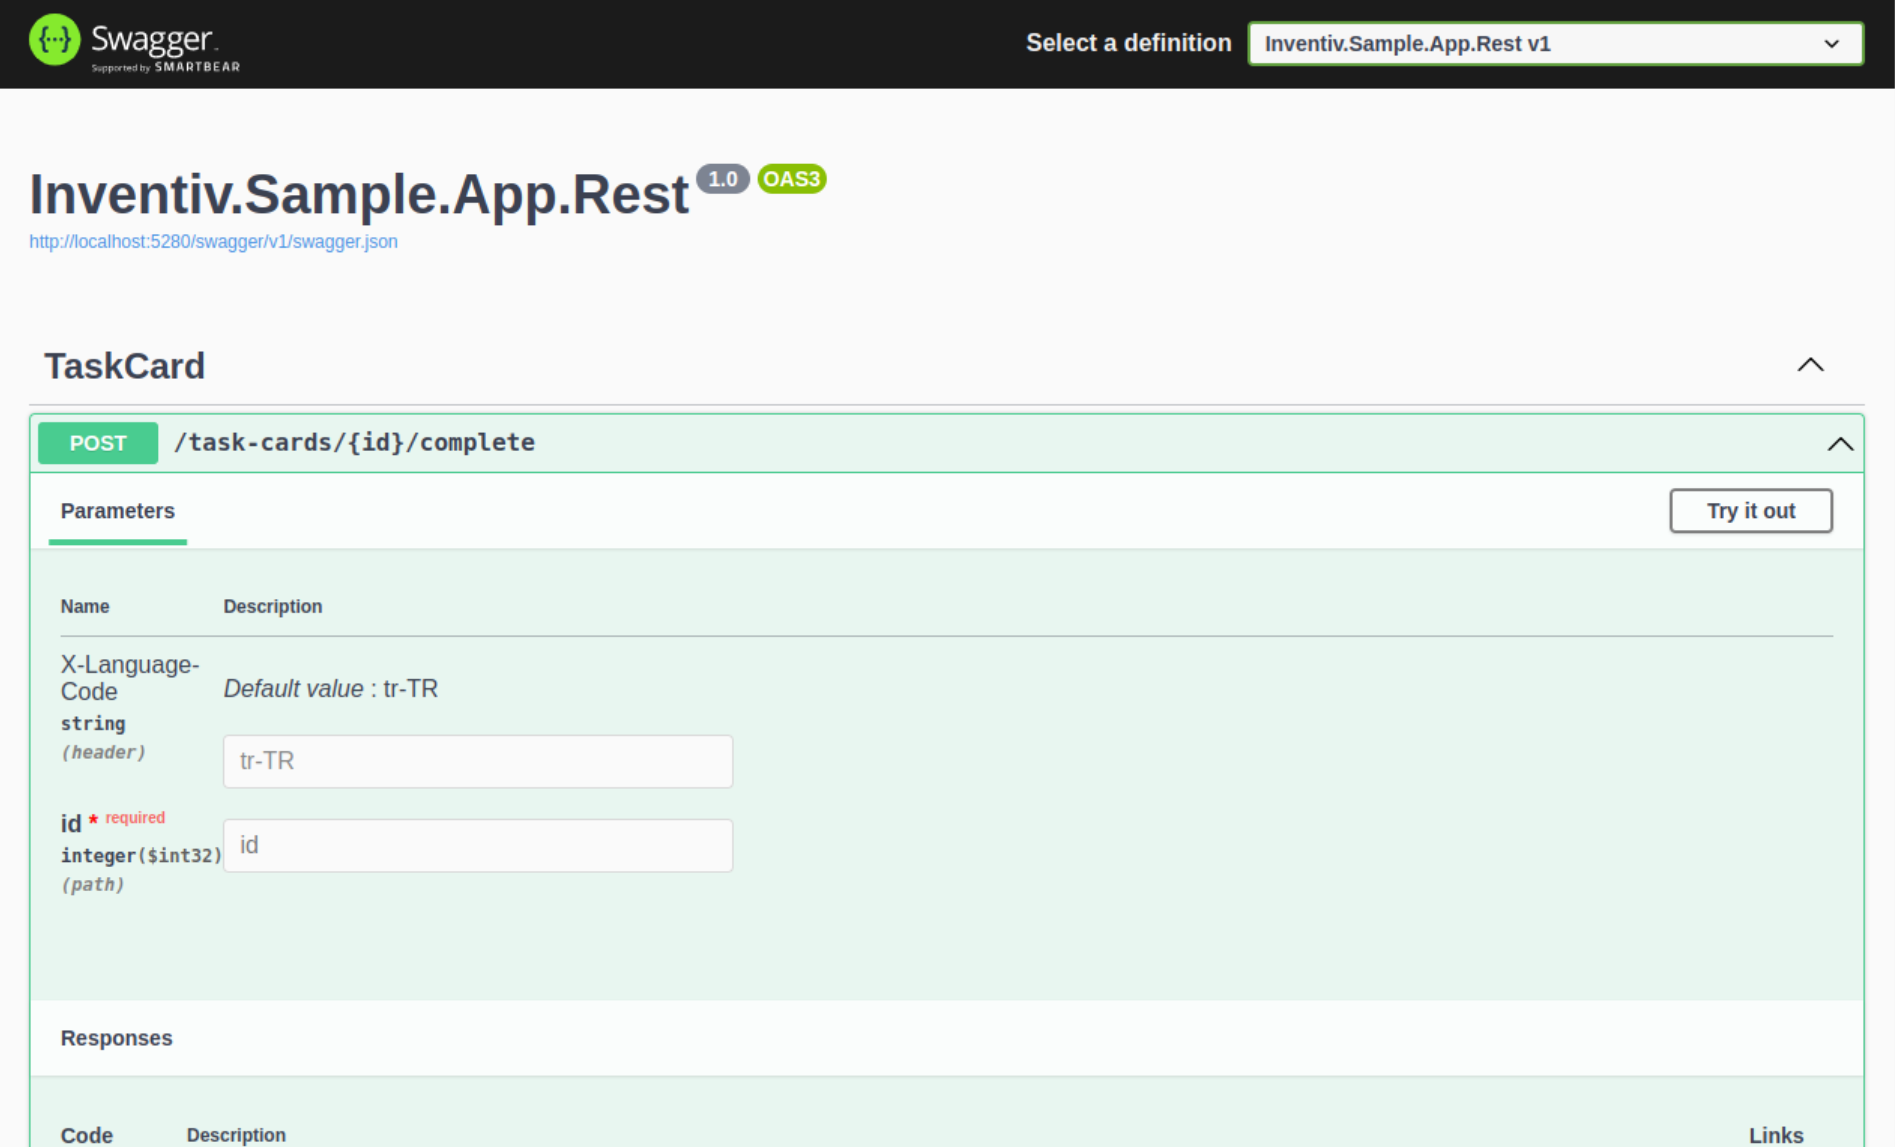
Try your endpoint by making an HTTP request to this URL, and make sure you use
an id value from your test database in place of {id}.
URL breakdown
Your api consists of 3 parts;
- Resource name in plural -
tasks - Id of the resource -
6 - Operation/method name -
complete
Resource name is in plural because you named your web service package after a
persistent class, TaskCard.
Improve your API Package
Now modify ITaskCardService.cs file as shown below;
namespace Inventiv.Sample.Module.Todo.Service;public interface ITaskCardService{ void Complete();}public interface ITaskCardsService{ ITaskCardInfo GetTaskCard(int taskCardId); List<ITaskCardInfo> GetTaskCards(bool completed);}public interface ITaskCardManagerService{ ITaskCardInfo CreateTaskCard(string? name);}public interface ITaskCardInfo{ int Id { get; } string? Name { get; } bool Completed { get; }}There are 3 new interfaces in your service definition;
ITaskCardsServiceto include services fromTaskCardsquery class.ITaskCardManagerServiceto include task card related services fromTodoManagermanager class.ITaskCardInfoto include properties ofTaskCardclass in responses.
Implement your new interfaces as shown below;
...public class TaskCard : ITaskCardService, ITaskCardInfo{ ...}public class TaskCards : Query<TaskCard>, ITaskCardsService{ ... ITaskCardInfo ITaskCardsService.GetTaskCard(int taskCardId) => SingleById(taskCardId); List<ITaskCardInfo> ITaskCardsService.GetTaskCards(bool completed) => ByCompleted(completed).Cast<ITaskCardInfo>().ToList();}......public class TodoManager : ITaskCardManagerService{ ... ITaskCardInfo ITaskCardManagerService.CreateTaskCard(string name) => CreateTaskCard(name);}...Notice that we make use of Explicit Interface Implementation to map
interface methods to class methods. This is required for methods of service
interfaces where return type in service interface is different than the
return type in implementing class. e.g. CreateTaskCard method returns
TaskCard in TodoManager class, but it returns ITaskCardInfo in
ITaskCardManagerService interface.
And finally add new interfaces to your api package;
...public class TaskCardApi : ICodingStyleConfiguration{ public void Configure(ConventionBasedCodingStyle codingStyle, IKernel kernel) { codingStyle.AddTypes(v => v.ApiPackage("TaskCard", t => t .Methods.Add(c => c.Proxy<ITaskCardService>().TargetByParameter<TaskCard>()) .Methods.Add(c => c.Proxy<ITaskCardsService>().TargetBySingleton(kernel)) .Methods.Add(c => c.Proxy<ITaskCardManagerService>().TargetBySingleton(kernel)) )); }}...Now rebuild and run both App.Service and App.Rest projects.
You now have 4 endpoints to test;
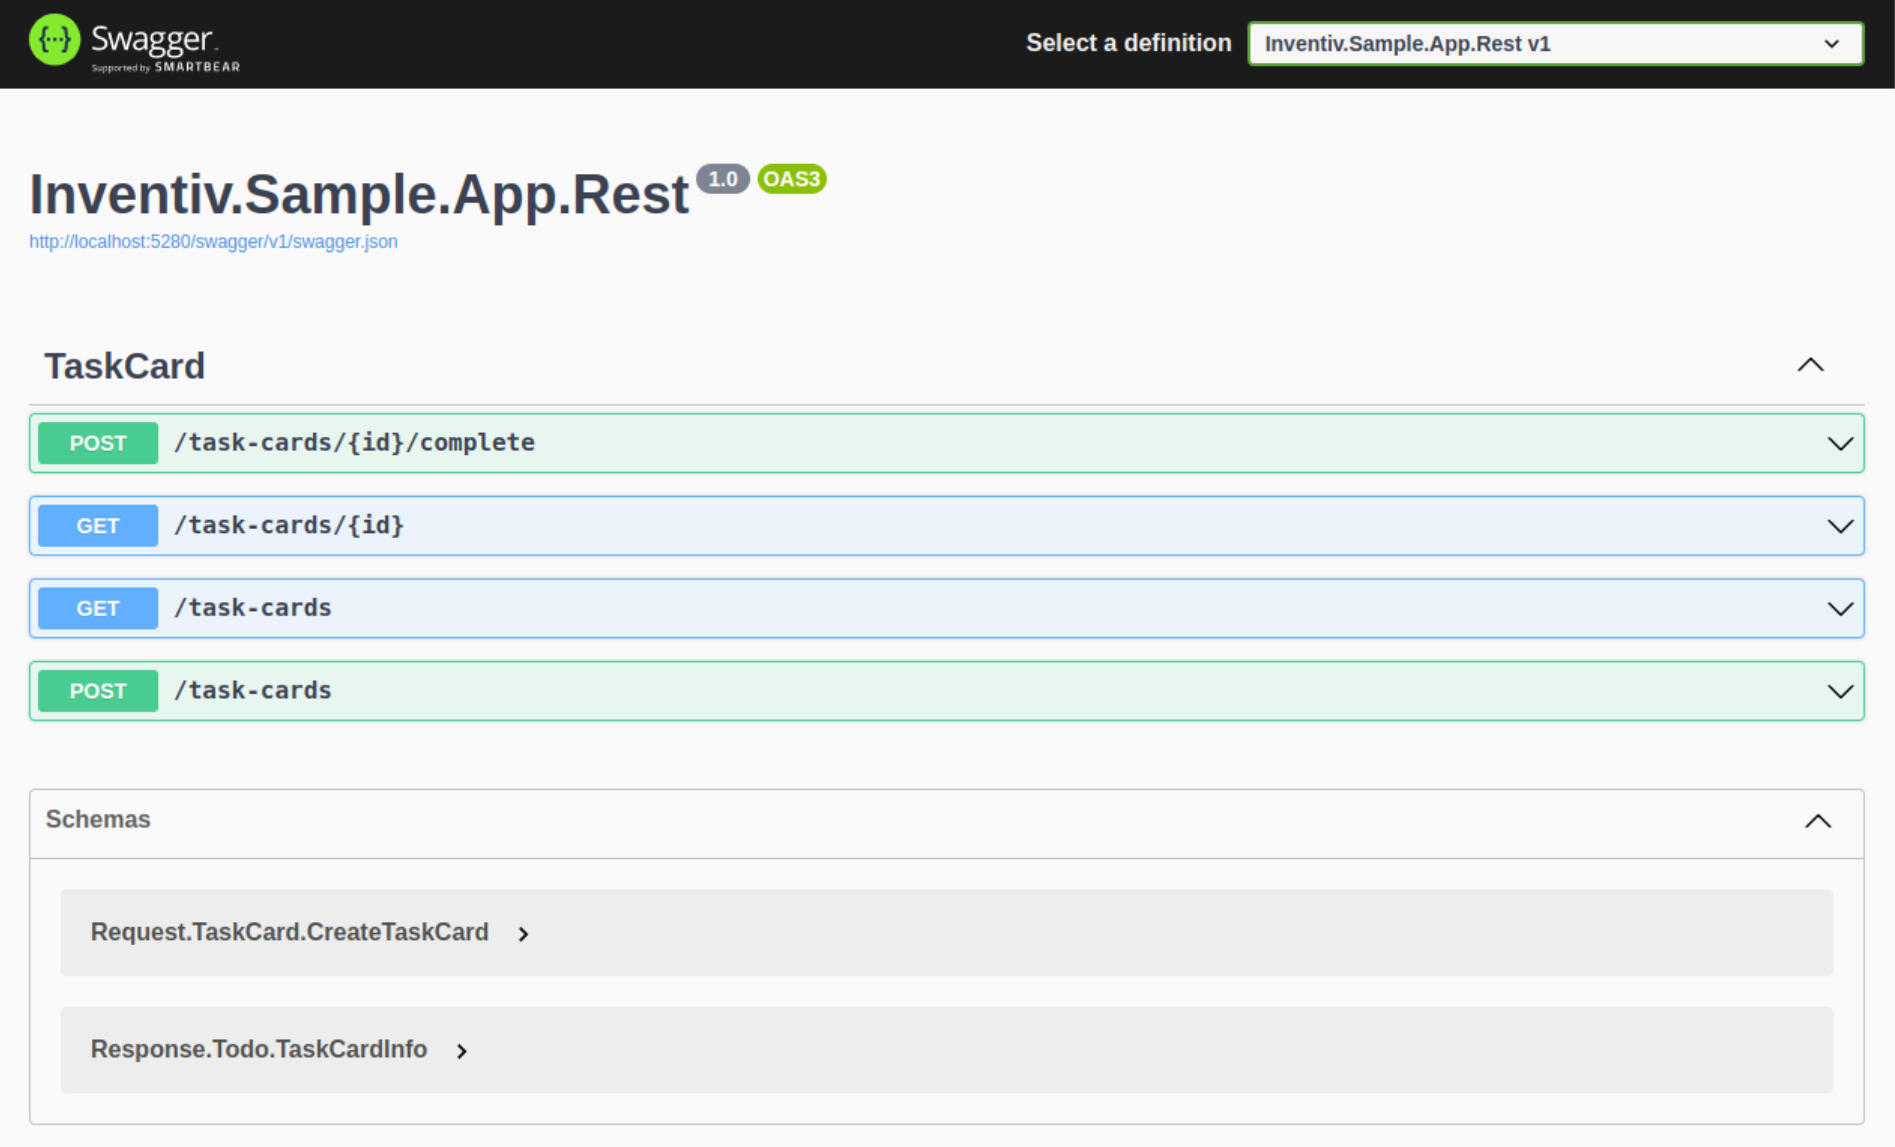
POST /task-cards/{id}/completemapped toITaskCardService.CompleteGET /task-cardsorGET /task-cards?completed={bool}mapped toITaskCardsService.GetTaskCardsGET /task-cards/{id}mapped toITaskCardsService.GetTaskCardPOST /task-cardsmapped toITaskCardManagerService.CreateTaskCard
Go ahead and test your endpoints!
Summary
In this section you've learned how to create a Rest API out of your business services.
Now try to create new persistent objects to enhance your to-do application.
You can move to next section to download a complete to-do application.
Here you can download source code for this tutorial
Sample Application
This tutorial is only a small portion of how you can build a backend solution, but there is much more to learn about Gazel.
Here you can download a complete to-do application with all endpoints and functionality. Examine it to have a better feeling of how you can build a similar solution.
More Reading
You can continue to read this documentation to have a deeper understanding of how Gazel works.
- See conventions to see all conventions Gazel exposes.
- See architecture to learn about the underlying architectural design.
- See features to learn what options you have and how to change the way Gazel behaves.